From time to time a need to edit some video material. And every time I need to do it, I’m – again – looking for a free video editor to use. I’m not willing to pay a lot of money or have an advertisers logo in the final video for something I only use like twice a year.
Lately, I had the need to edit some .mkv files which none of my already installed editors seem to support. However, I remembered watching a video about using blender as video editor and after quickly starting blender and importing my files I realized – it works!
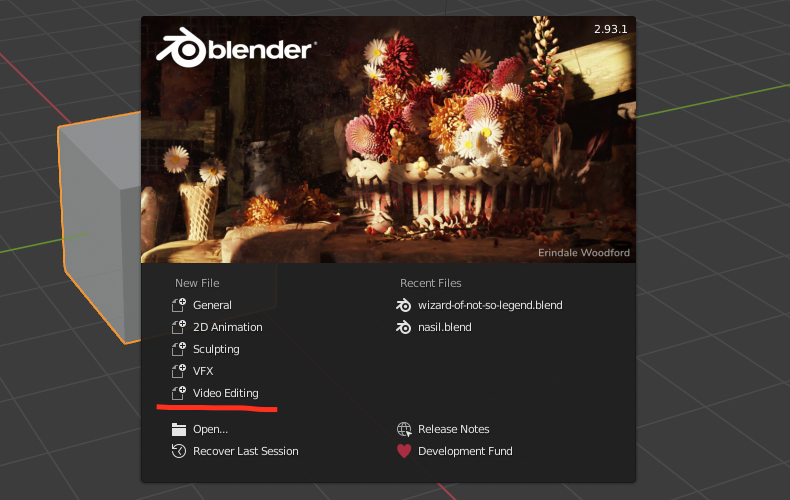
The most easy way to start using blender as video editor is to select “Video Editing” on start of blender, when creating a new file.
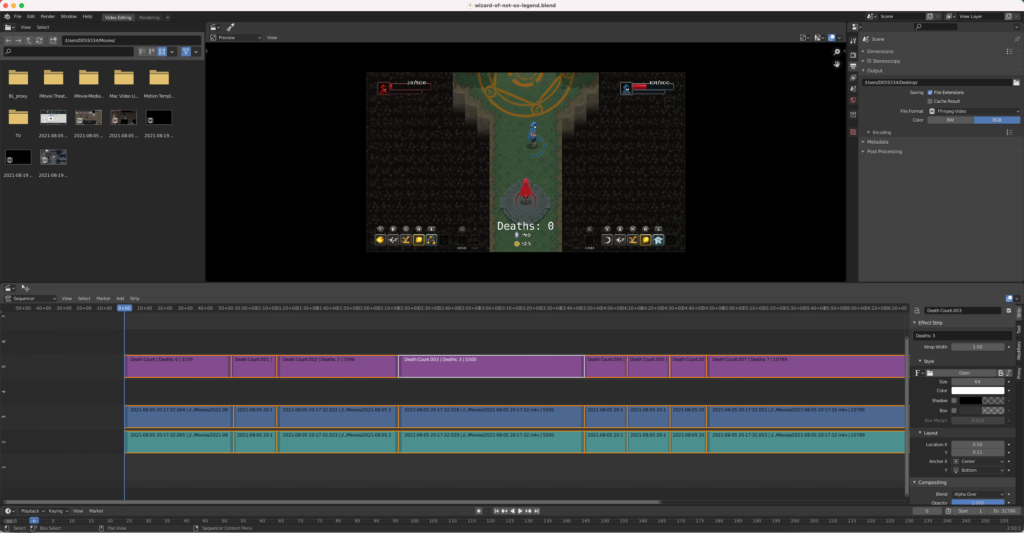
In general, blender looks like any other simple video editor.

You have different video / audio tracks available and a big preview at the top center area. The file explorer is in the top left corner and via drag & drop you can add files to your tracks. The blue line in the track editor at the bottom indicates your current frame which is also shown in the preview.
The biggest difference to common video editors (that I have used) is the usage of frame numbers instead of timestamps everywhere. Even the total length of the video must be setup in start & end frame instead of a time.
Putting together different files is very easy and the performance of blender is good. Especially the preview loads quite fast! The creation of text-overlays is also very easy to understand and intuitive to use.
However, the fast-forward effect seemed to be a little bit tricky. If the play time is doubled, the video length has to be reduced by half its size. I would have expected that the editor simply skips every second image as it would be way faster to edit the video then.
After all I’d say that blender is a surprisingly good video editor!